")
Eberspacher Air Heater Installation Checklist (Diesel & Gasoline, 2025)
Posted by [email protected] on 14th Sep 2025
Installing an Eberspacher (sometimes referred to as Espar) air heater, whether diesel or gasoline, is one of the best upgrades for vans, RVs, cranes, trucks and other work vehicles. But successful installation requires more than bolting the unit into place. Even small oversights can lead to poor airflow, fuel delivery problems, or unsafe exhaust routing. Heatso created this checklist after working with Eberspacher engineers in Germany and consulting professional installers in the US and worldwide.
Eberspacher Air Heater Installation Checklist
Installing an Eberspacher (sometimes referred to as Espar) air heater, whether diesel or gasoline, is one of the best upgrades for vans, RVs, cranes, trucks and other work vehicles. But successful installation requires more than bolting the unit into place. Even small oversights can lead to poor airflow, fuel delivery problems, or unsafe exhaust routing. Heatso created this checklist after working with Eberspacher engineers in Germany and consulting professional installers in the US and worldwide.
This guide highlights the most common oversights in Eberspacher air heater installations. It is designed as a companion to, not a replacement for, the official Eberspacher installation manuals. Always confirm specifications such as fuel line lengths, fuse ratings, and mounting angles in your model’s manual.
Why Heatso Compiled This Checklist
At Heatso, our mission is to supply customers with top-tier products they can rely on. Eberspacher heaters are among the best in the world - in fact, some of our customers still have units running strong after 20 years of service.
But even with such durable products, we’ve learned that installation plays a critical role in performance. After years of working with customers and troubleshooting issues, we found that certain installation mistakes can prevent an Eberspacher system from working correctly. The Heatso team has decided to do something about it, so we created a checklist that helps prevent the most common problems.
The official Eberspacher manuals provide every technical detail, and following them meticulously should prevent most problems. However, in real-world installations this is not always the case. Our checklist is designed to cover those blind spots and should be used as a supplement to the Eberspacher installation manual.
To help installers avoid these pitfalls, Heatso consulted directly with Eberspacher engineers - including product development experts in Germany - and experienced installers across North America and Europe. Their combined knowledge allowed us to create a practical, field-tested checklist.
This checklist is designed for most Eberspacher air heater installations. Specialized applications, such as marine setups, may have different requirements. In those cases, always follow the manual specific to your heater.
And if you’re here because your cabin heater is already giving you trouble, we recommend reviewing this checklist carefully and also checking our Eberspacher error codes page for additional guidance.
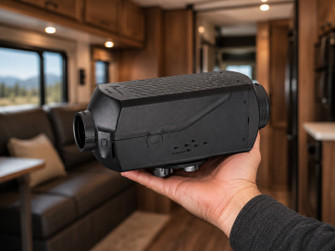
Step 1: Heater Mounting
Mounting is the foundation of every successful Eberspacher air heater installation. The manual requires that the heater is fixed to a flat surface, that the flange seal is installed, and that the heater sits within the permitted mounting angles. These precautions prevent vibration, fuel delivery issues, and gas leakage.
Checklist reminders:
- Install the flange seal at the heater base to prevent exhaust gases from entering the cabin.
- Position the heater within the allowed tilt angles listed in the manual.
- If using a floor plate, ensure it extends through the panel and is fully sealed.
- Protect external mounts from splash water, dirt, and stone impacts.
- Leave space for maintenance access, such as removing the glow plug or control unit.
Before running the heater for the first time, check that the fan impeller spins freely without touching the housing.
Step 2: Hot Air Distribution (Ducting)
Airflow is critical to both performance and safety. The Eberspacher manual warns that undersized or obstructed ducting can cause overheating and shutdowns.
Checklist reminders:
- Match duct size to heater output: 2.4" for compact, 3.0–3.5" for mid-range, 3.5" for high-output models.
- Keep ducting runs within the maximum supported length for your model.
- Avoid sharp bends, kinks, or crushed hoses.
- Fit protective grilles on outlets if ducts are not installed.
- Keep intake and outlet separated to prevent hot air recirculation.
- Use hoses rated for at least 250°F (120°C).
Following these guidelines ensures the heater distributes warm air efficiently and avoids triggering safety cutoffs. If you want to know more about the correct ducting setup and how to avoid overheating, please read this blog. If you want to know what happens if you do not follow the guidelines, please read this blog. If you need hot air ducting, it can be found here.
The combustion and exhaust system is one of the most safety-critical parts of a diesel heater set up. Exhaust pipes are not gas-tight and become extremely hot, so correct routing is essential.
Checklist reminders:
- Maximum exhaust length: 6.5 ft (2 m), unless stated otherwise in your model’s installation manual.
- Route pipes opposite to the direction of travel to reduce backpressure.
- Angle the exhaust downward and away from windows, doors, and vents.
- Keep intake and exhaust pipes separate to avoid cross-contamination.
- Never route intake or exhaust inside the cabin.
- Secure pipes every 8–12 inches, with 20 inches as the maximum spacing.
You may shorten the exhaust pipe to fit your installation, but never exceed the maximum length specified in the manual. Always fit the flange seal correctly to prevent gas leaks.
Step 4: Fuel System Installation
The fuel system is a common source of issues. The manual specifies exact hose sizes and pump angles to ensure consistent operation. Incorrect components or poor routing can cause air bubbles, lockouts, or flooding.
Checklist reminders:
- Use the specified fuel line size: 5/64" ID (2 mm), 5/32" OD (4 mm) for most diesel cabin heaters, but always double check the manual. For example, the gasoline version B2L uses two different sizes for the fuel lines.
- Mount the fuel pump at a 15–35° angle with the connector facing upward (XL3 versions may differ.)
- Secure and protect fuel lines, routing them away from hot surfaces, moving parts, and sharp edges.
- Always use a dedicated standpipe instead of tapping into the vehicle’s main fuel line.
- Stay within hose length limits for your specific model.
- Use only kit-supplied clamps for secure, airtight connections.
Most “Espar bunk heater not working” cases reported after installation are linked to fuel supply issues - often incorrect line length, poor pump angle, or air leaks.
Step 5: Electrical Connections
Reliable power is essential for proper operation. According to the manual, voltage drop in the cables must not exceed 0.5V at 12V or 1V at 24 V. For 12-volt heaters, the undervoltage cutoff is around 10.5 volts and the overvoltage cutoff is around 16 volts. For 24-volt heaters, the undervoltage cutoff is about 21 volts and the overvoltage cutoff is about 32 volts. In both cases, the protection system responds in roughly 20 seconds.
Checklist reminders:
- Connect the heater directly to the main battery, not through the vehicle’s power management system.
- Remove the fuses during installation. When reinstalling, insert the heater’s 20A fuse first, followed by the 5A fuse.
- Use the correct fuse ratings as listed in the manual (often 20 A at 12 V).
- Secure wire looms and keep them away from exhaust parts or sharp edges.
- Ensure all connectors are fully seated, with unused wires insulated individually.
Most random shutdowns weeks after installation come down to electrical errors rather than heater defects.
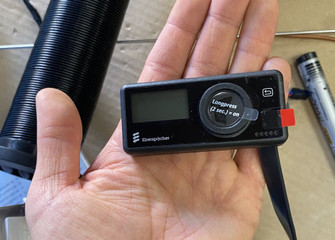
Step 6: Final Safety and Function Check
The final step is commissioning. The manual requires the heater to run at full output for 20–30 minutes to ensure stable operation.
Checklist reminders:
- Inspect the fuel system for leaks and purge air bubbles.
- Check exhaust and intake routing for vibration or hazards.
- Allow the heater to complete its automatic cool-down cycle.
- Perform a diagnostic check for any stored error codes.
This commissioning test verifies that your Eberspacher air heater installation is safe and reliable before daily use.
FAQs: Eberspacher Air Heater Installation
- Does this checklist apply to gasoline air heaters too?
Most installation principles apply to both diesel and petrol Eberspacher air heaters. However, some aspects, like the fuel line sizing may be different for some gasoline models. Therefore, always confirm the exact fuel system requirements in your manual. - Can the exhaust pipe be shortened?
Yes. It can be shortened to fit your layout. Just make sure it does not exceed the maximum length in the manual and is angled downward securely. - Why must the Eberspacher heater connect directly to the battery?
Because vehicle power systems can reduce voltage. A direct battery connection ensures steady power for startup and operation. - Can I hook up the cabin heater to the solar power setup?
This is not recommended. From our experience, this causes a number of problems. We interviewed seven Eberspacher installers, and they all agreed with us. If you want to avoid problems with your cabin heater - connect it directly to the main battery and make sure it is in good condition. - My Espar bunk heater is not working after installation. Could wiring be the cause?
Yes. Many cases of an Espar bunk heater not working trace back to poor electrical connections, incorrect fuses, or voltage drop due to connecting the system to the leisure battery. Always check wiring first. - What is the best way to complete a diesel heater set up?
A proper diesel heater set up follows each step in this checklist: correct mounting, safe ducting, secure exhaust routing, precise fuel installation, and stable wiring. Always end with a 20–30 minute test run. - Is this checklist useful for camper van diesel heater installation?
Yes. This guide is particularly relevant to a camper van diesel heater installation, where space is limited and routing mistakes can cause overheating or leaks. - Can I reuse hoses or ducting from an old install?
We do not recommend this. Old hoses and ducting degrade over time. Always use new, genuine components from your kit or recommended in the manual. - How long should I run the heater after installation?
At least 20–30 minutes on full power. This clears the air from the fuel system and ensures safe, stable operation. Heatso also recommends performing this cabin heater test run once a month. - Is this checklist useful for Vevor, Autoterm or Chinese heaters?
Yes. The same principles apply. If you are researching a chinese diesel heater, vevor diesel heater installation or an autoterm diesel heater installation, you can use this checklist for general guidance. Still, always follow the manufacturer’s manual for those brands.
Safety Note: This checklist highlights the most commonly overlooked details in Eberspacher air heater installations. It applies to most standard setups, but specialized applications such as marine installs may differ. Always follow the official Eberspacher manual for your model to ensure safety and warranty compliance.
Get the Right Parts for Your Installation
Heatso supplies complete installation kits, spare parts, and accessories for Eberspacher diesel and gasoline air heaters. With genuine components, you avoid the common pitfalls that lead to lockouts or performance issues.
Browse our full selection at Heatso.com or contact our technical team for expert support.
For long-term reliability and warranty support, Heatso always recommends genuine Eberspacher heaters.