How to dewinterize your RV
Posted by Heatso on 4th Mar 2023
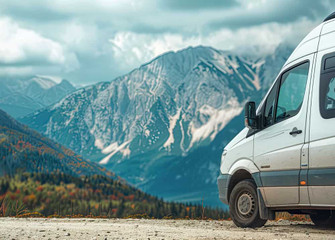
As the winter season comes to an end, it's time to prepare your RV or camper for another season of adventure on the road. Dewinterizing your RV or camper is crucial for preparing for your upcoming travels.
HOW TO DEWINTERIZE YOUR RV: A COMPLETE GUIDE FOR A NEW SEASON OF VAN LIFE
As the winter season comes to an end, it's time to prepare your RV or camper for another season of adventure on the road. Dewinterizing your RV or camper is crucial for preparing for your upcoming travels. We've put together a comprehensive guide on how to de-winterize a camper trailer, so you can hit the road with confidence.
ON THIS PAGE
CHECK YOUR TIRES
Before embarking on your next adventure, checking your tires is essential. Your tires are one of the most critical components of your RV or camper trailer, and they should be in top condition to ensure a safe and comfortable journey.
Start by inspecting your tires for any visible damage, such as cracks, cuts, or punctures. Check for any uneven wear on the tread and sidewalls, as this could indicate that your wheels are misaligned. Also, look for signs of aging, such as dry rot, which can weaken the tire's structural integrity.
Check the tire pressure using a reliable gauge, and ensure it's inflated to the manufacturer's recommended pressure. You can find this information in the owner's manual or on the tire's sidewall. Overinflated or underinflated tires can cause handling issues and reduce fuel efficiency.
INSPECT THE EXTERIOR
Start by inspecting the roof of your RV or camper trailer. Look for any cracks, holes, or tears that may have occurred during the winter months. Check the sealant around vents, skylights, and other roof fixtures. Any sign of wear or cracking on the sealant can indicate that it needs to be replaced.
Next, examine the walls and windows of your RV or camper trailer. Look for any cracks, holes, or dents that may have occurred while in storage. Check the weather stripping around windows and doors, and replace any worn or damaged parts.
Finally, take a look at the undercarriage of your RV or camper trailer. Check for any rust or damage to the frame, suspension, or brakes. If you notice any damage, have it repaired by a professional before hitting the road.
CHARGE AND REINSTALL YOUR BATTERIES
Start by checking your battery's charge level using a voltmeter. A fully charged battery should read around 12.6 volts or higher. If the charge is low, you'll need to charge the battery using a battery charger.
Once your battery is fully charged, reinstall it in your RV or camper trailer. Make sure the terminals are clean and free of corrosion. You can clean them using a wire brush or battery cleaner spray.
Next, check your battery's fluid levels. If your battery is a traditional lead-acid type, you'll need to top off the cells with distilled water. If you have a sealed, maintenance-free battery, you won't need to check the fluid levels, but you should still inspect the battery for any signs of swelling or damage.
FLUSH YOUR WATER SYSTEM
Flush your water system to ensure that the water is safe and clean for consumption. Water systems can stagnate during the winter months, leading to the growth of bacteria and other harmful contaminants. It's essential to flush the system thoroughly to ensure the water is safe to drink.
First, remove the antifreeze from your water system. Start by draining the antifreeze from the water heater and the water lines. Next, refill the water tank with fresh water. Turn on the water pump and open all the hot and cold faucets to flush out the antifreeze. Run the water until it's clear and free of any residue.
Once you've flushed out the antifreeze, sanitize the water system to kill any bacteria or other contaminants that may have grown during storage. Use a water system sanitizer that's safe for your specific RV or camper trailer. Follow the manufacturer's instructions and allow the sanitizer to sit in the water system for the recommended amount of time.
After sanitizing the water system, flush it with fresh water to remove any remaining sanitizer. You may need to repeat this process several times until the water runs clear. Finally, replace the water filter if necessary. Water filters can become clogged and contaminated during the winter months, so replacing them before using your water system is a good idea.
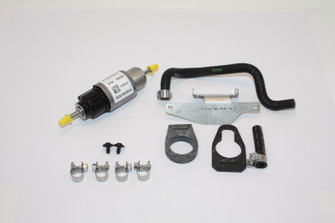
Webasto Dual Top ST 6 Heater kit
Espar Hydronic D5E 12V Diesel
Espar Hydronic B5E 12V Gasoline Petrol
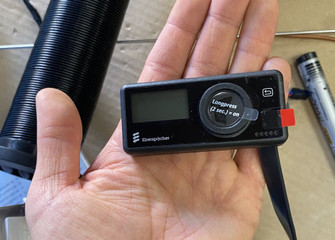
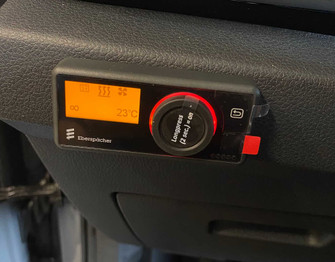
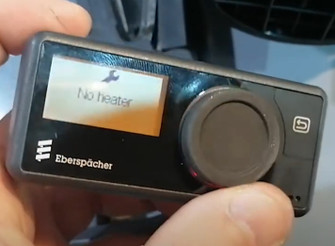
CLEAR OUT YOUR AIR HEATER
It's crucial to clear out your air heater and perform proper maintenance regularly to prevent carbon build-up. Carbon build-up can cause clogging in the heater's combustion chamber, leading to improper combustion and inefficient heating. Additionally, carbon build-up can pose a fire hazard and create harmful carbon monoxide emissions.
To maintain your air heater properly, you should thoroughly clean the combustion chamber and exhaust pipes. Use a soft brush or vacuum to remove any carbon build-up inside the heater. You should also regularly check and replace the air filter to prevent dust and debris from accumulating in the combustion chamber.
During your Spring maintenance, it's recommended to have a professional inspect your air heater to ensure it's functioning correctly and safely. A qualified technician can check for leaks, inspect the heat exchanger, and perform necessary repairs.
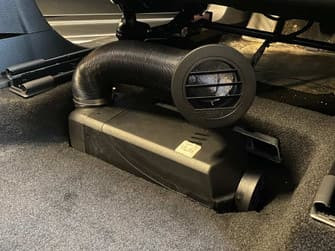
Webasto Air Top 2000 STC 12V Heater Kit (Diesel)
Webasto Airtop Evo 55 12V Diesel Heater
Espar S2 D2L 12V Airtronic Diesel Sprinter kit
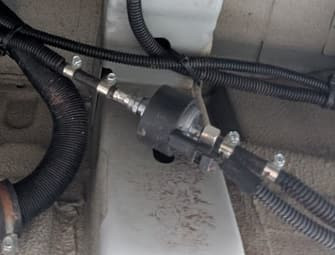
CHECK FOR LEAKY PIPES
Turn on the water pump and pressurize the water system to check for leaky pipes. Check for any visible leaks around the water pump, water heater, and other water system components. Look for water dripping or pooling around the pipes and fittings.
If you don't see any visible leaks, check for unusual sounds from the water system, such as hissing or gurgling. If you need to fix or replace any part of your water system, check out our comprehensive guide to RV water systems.
To fix a leaky pipe, first turn off the water pump and drain the water system. Use a wrench to tighten any loose fittings or connections. If there is a crack in a pipe, use a pipe cutter or hacksaw to cut out the damaged section and replace it with a new one.
TEST YOUR APPLIANCES
Testing your appliances is important when de-winterizing your RV or camper trailer. These appliances, like your air conditioner, refrigerator, microwave, and other electronics, may not have been used for several months and may need some maintenance before they're ready to use again.
To test your kitchen and household appliances, plug them in and turn them on to ensure they work correctly. Check for any strange noises or smells coming from the appliances. If your appliances are functioning properly, check the cords and plugs for any signs of wear or damage. Look for frayed wires, cracks in the insulation, or loose connections.
You should also check the electrical outlets in your RV or camper trailer to ensure they function correctly. Use a voltage tester to check the outlets for proper voltage and replace any outlets not working.
CHECK THE ENGINE
Checking the engine is essential when de-winterizing your RV or camper trailer. Proper engine maintenance can help prevent breakdowns, improve fuel efficiency, and ensure your vehicle is ready for the upcoming season.
First, check the oil. If the oil appears dirty or low, replace it with your engine's recommended type and weight. Inspect the air filter and replace it if it is dirty or damaged. Inspect the belts and hoses for cracks, fraying, or leaks. Replace any worn or damaged belts or hoses. Check the coolant level and condition and replace it if necessary. Check the radiator for any leaks or damage.
Inspect the brake fluid and transmission fluid levels and condition. If the fluids appear dirty or low, replace them with the recommended type for your vehicle. Finally, start the engine and let it run for several minutes to ensure it's running smoothly.
CHECK WINDOWS AND AIR VENTS
Check your windows and doors for any signs of damage or wear, including cracks or gaps that could let in air or water. Make sure that your window seals are tight and that your windows and doors close properly.
Inspect your air vents and make sure that they're clean and free of debris. Check that the vent covers open and close and that they're not cracked or damaged. If you have a roof vent or fan like the MaxxAir MaxxFan Deluxe, ensure it works correctly and opens and closes smoothly. Check the vent cover and make sure it's not cracked or damaged.
Indel B OFF Plein-Aircon 12V Air Conditioning Unit
Dometic RTX 2000 Roof-Mounted Air Conditioning Unit
MaxxFan Deluxe Remote Control Roof Fan Vent
CHECK SAFETY DEVICES
Checking the safety devices in your RV or camper trailer is crucial for ensuring a safe and enjoyable trip. Here are some of the key safety devices to check during the de-winterizing process:
- Smoke and Carbon Monoxide (CO) Detectors: Check the batteries in your smoke and CO detectors and replace them if necessary. Test the detectors by pressing the test button, and make sure that they're working properly.
- Fire Extinguisher or fire blanket: Check the expiration date on your fire extinguisher and replace it if it's expired. Make sure that the fire extinguisher is easily accessible and that everyone knows how to use it.
- Propane System: If you use a propane system, be sure to check it for leaks, and make sure that all connections are tight. Test your propane detector by lighting the stove and then turning it off to see if the detector sounds an alarm.
Commander Fire Blanket 1.1m x 1.1m
FireAngel CO-9XT-FF Carbon Monoxide Alarm
READY TO HIT THE ROAD
Dewinterizing your RV or camper is an essential step to preparing for your next adventure. By following these steps, you'll ensure your vehicle is in good condition and ready to hit the road. With a little bit of effort and attention to detail, you can ensure that the new season will be full of safe and enjoyable adventures.